
Pouf!
Posted by Christy Miller on Sunday 23 June 2013. Filed under: Design Sponge, floor pouf, nursery, pouf, vintage fabrics
I saw this pattern for a floor pouf on Design Sponge a long time ago and thought it would be a fun project. The nursery was a great excuse to try it out and I look forward to seeing baby use it as a little seat in the years to come.
Here's the pattern.
Like most projects, it was all about the prep work: procuring and choosing the fabrics, cutting, cutting, cutting, and making sure I had the right supplies for the job. Now that I own a 12" upholstery needle, watch out!
 |
| My colour palette |
Since we don't know whether the baby is a boy or a girl, I've chosen teal as the accent colour for the room, and I was able to use a number of fabrics I already had on hand, as well as pull in other fabrics from the nursery projects I'd been working on.
Because this project is for our own little one, I thought it would be special to use a few of my Grandma's vintage fabrics that my Mom gave me (fifth from the left and second from the right in the photo above).
 |
| Mass-producing the muslin lining |
I made a sturdy template for the pie pieces by gluing the Design Sponge template onto a piece of cardboard and then tracing and cutting out all 48 pieces.

The design sponge directions are good, for the most part, but when you get to #5: Sewing the Wedges, here's a tip.
It says: "Beginning at the wide end of the wedge shape, sew the layers together
using a ¼” seam allowance. Sew a gradual curve along the angle at the
base of the wedge (rather than sewing a distinct point). Stop the seam
when you reach the point."
I had to do this step again and really curve my seam as it reached the point of the wedge. You almost want the points to start to overlap with one another so that all of the wedges form a tight point. Otherwise when you attach the two sides, you'll have a hole in middle. (I did this twice and I still had a little hole in the middle that I had to patch before attaching the button and washer)
 |
| Bring the wedges as close together as possible. |

Also pay close attention to step #8, where you sew the mirror version of the top half. Check and double check that you are sewing the wedges together in the right configuration so that you will have a matching bottom!


Seeing the pieces come together was extremely satisfying!

Then it was time to feed this beast. I ended up needing slightly more fibre fill than the pattern called for, but 3lbs would be a good start.

I spent a long time trying to even out the stuffing so that the pouf wouldn't be lumpy, but I think that the Design Sponge pouf was photoshopped, as there is just NO WAY to get it that smooth. It could also be on account of the fact that my fabrics were a mixture of broadcloth, cotton and a kind of canvas, so the stretch and pull of the fabric throughout was a bit off.
Because I forget my basics all the time, once the pouf was full I had to re-learn how to sew a seam closed, so I'm including this video here so that I know where to look when I inevitably need it the next time.
How to sew a slip stitch video.

If you try this project, you might be thinking that you could use some regular upholstery needle that you have around the house to attach the washers to the top and bottom. You can't. Once the pouf is filled with stuffing, you need a really long needle to be able to get all the way through. In fact, it took both my husband and I to hold the washers in place and push the needle through the pouf in a straight line through the middle.
Sidenote: It was because of my need for this obscure needle that I discovered Century Textiles on this project. This is a little hole in the wall of a place, but now I know where to find some of the weird supplies I need (like boning for another project I was planning).
Once your washers are attached, all you need to do is attach some decorative buttons to cover them and you're done. Pouf! Just like that.
 |
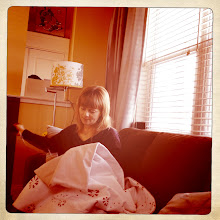
| Just chillin' out in the baby's room. |
No Responses to Pouf!
Leave a Reply