
A banner day.
Posted by Christy Miller on Thursday 7 March 2013. Filed under: banner, bunting, Fabric banner, name bannerWhere does the time go?
My sweet niece Everleigh is already one year old!

There are quite a few tutorials out there for bunting flags, but none were quite what I was looking for, so I came up with this on my own.
This is a project that you could easily complete in an afternoon.
Supplies:
- Layer cake pieces (10" x 10" pieces) in a design of your choice (I used Oh Deer by Moda, which I love)
- Contrasting fabric for the letters
- Contrasting thread
- Bias tape in matching or contrasting colour (I chose a medium size bias tape, not quilt size)

Once I had my 18 pieces, I arranged them in an order I found appealing (front and back).

Then, I set the contrasting letter fabric on top of the letter template page and traced the outline of each letter directly onto the fabric.
I applied fusible interfacing to the back of the letter fabric and then cut out each letter. Then, I applied the letters to each of the flags.
After that, it was time to practice my machine applique stitching. I created a sample flag to practice on, but I also came across this great tip for machine appliqueing so that you get a nice clean corner.


 You'll want to increase density of your zig zag stitch for appliqueing as well.
It was while I was appliqueing the letters that I thought, "Whew! Everleigh has a LOT of letters in her name!
Once the letters were sewn on, place the right sides of each flag together and sew with a 1/4" inch seam.
Turn the flags carefully (or use a bamboo turner) and then give each of the letters a spray with speed starch before a ironing them flat.

Leaving at least a foot long tail on each end of the bias tape, pin each of the letters into the inside fold of the bias tape and sew using a zig zag stitch.


Tuck the ends of the bias tape in and stitch in place.
And voila! Admire the results:


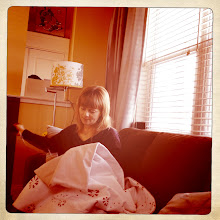
Pop it in the mail - and wait to hear from...

...another satisfied customer!
1 October 2013 at 05:35
I love your banner! It's such a great idea to use a zigzag stitch.